I recently went wingless and loved the look but could not stand the plastic plugs used to cover the holes. I decided to fill in the holes and re paint the deck lid. All in all it was an easy, but time consuming process, but well worth. Here is how I did it.
Things you will need.
1. sandpaper (all grits)
2. power sander
3. metal tape
4. bondo
5. newspaper
6. painters tape
7. primer paint
8. body color paint
9. clear coat paint
10. power buffer
11. cutting and buffing wax
A few notes:
- the paint i used was duplicolor exact match Hyundai Silver, its a 99.99% match.
- make sure you have a covered area to keep the car overnight to keep bugs or rain from getting on the paint.
- take your time and be thorough with the sanding.
- All of the materials cost me around $100
Step by step process.
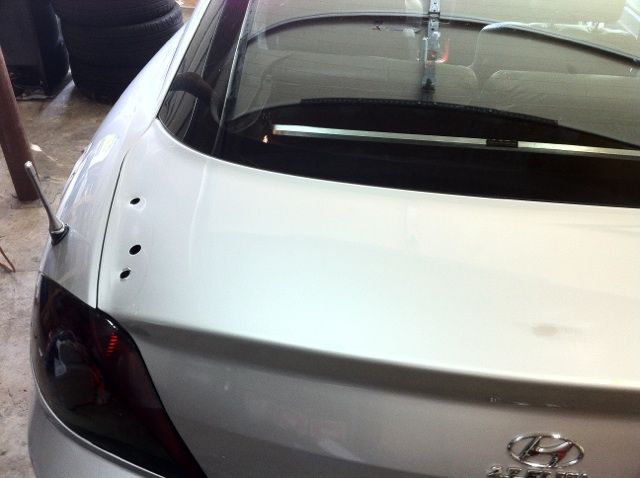
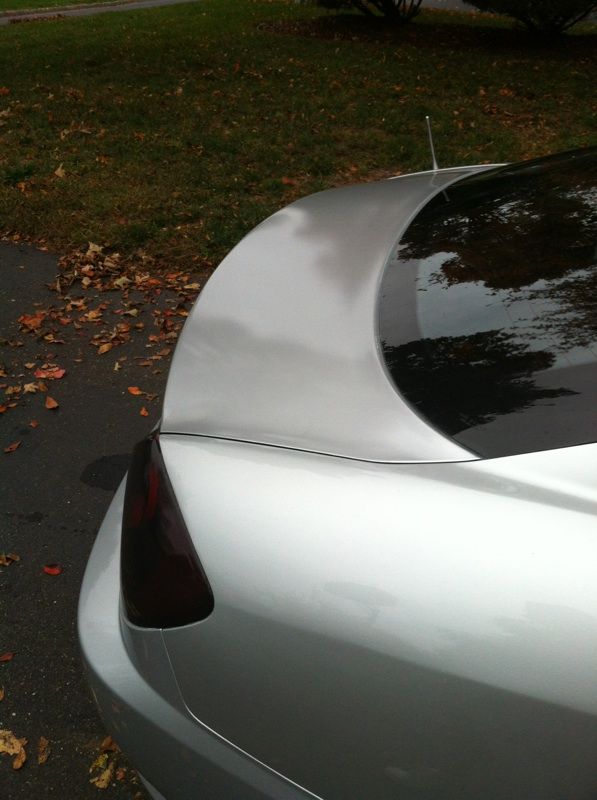
1. First thing you need to do is take off the spoiler. This is done by unscrewing the four screws holding it from the inside of the deck lid.
this is what it will look like:
![]()
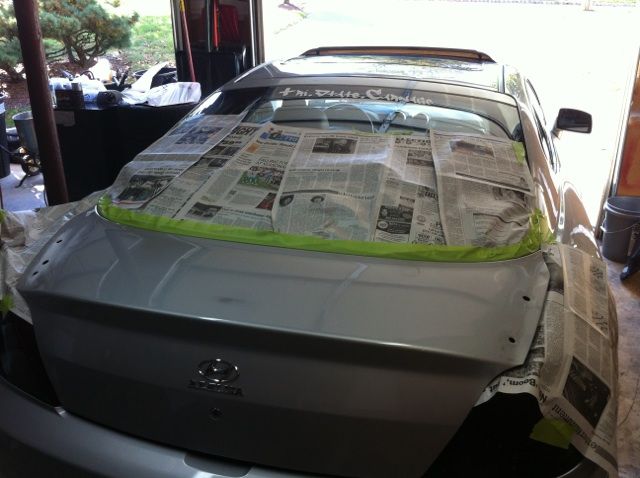
2. Once you have the spoiler off it is time to mask off the entire area. Take your time doing this as you want to cover every possible area. over spray is not a fun thing to deal with.
this is how mine looked:
![]()
3. After you have it all masked off you can start sanding. Start out with a low grit and work your way to a higher grit. Make sure you sand the entire area evenly. If you have high and low spots they will show up when you paint.
almost there:
![]()
After this pic was taken I continued to sand until i was pleased with the entire surface. Make sure everything is nice and smooth.
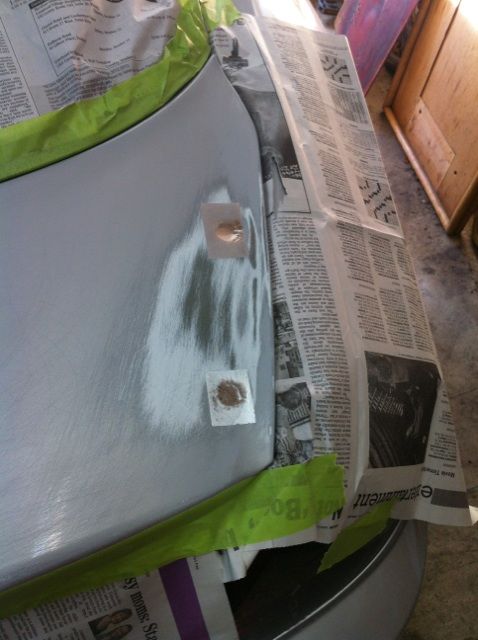
4. Once its all smooth I covered the holes with the metal tape.
![]()
![]()
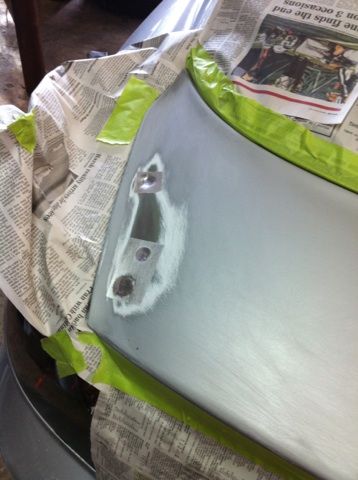
5. Now that the tape is on you can go ahead and Bondo over them. This was my first time with Bondo and it was so easy. Just follow the directions on the container. I used about a tablespoon of Bondo or each hole. Smooth out the Bondo with the supplied tool and wait for it to harden.
6. Once the Bondo is hardened you can sand it down. This is a crucial aspect of the process. Take your time sanding down the Bondo so it is even with the surrounding areas. Once again, you will see any high or low spots when you paint.
![]()
7. examine the area for any flaws. After this step their is no going back without having to sand it down and starting over.
8 Apply the primer coat. I did three coats with about 30 minutes in between each one.
9. Apply the color coat. I did 3 coats with 1 hour between coats. Let the final coat dry for a few hours.
10. Apply the clear coat. I used 2 coats and 1 hour between. Let the clear dry for as many hours as possible. I let mine dry overnight.
11. Once the clear is dried you will need to wetsand it and buff it to make it really shine.
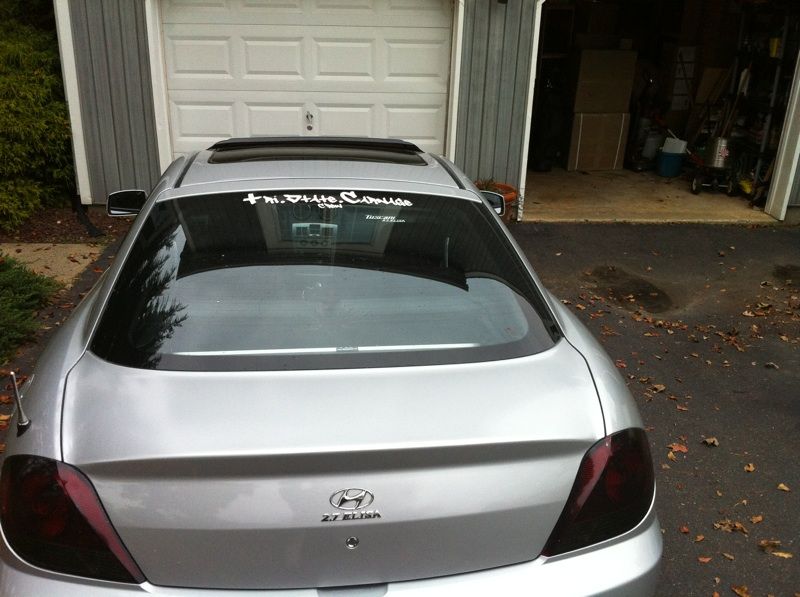
Here is what the finished product looks like:
![]()
![]()
![]()
If anyone has any questions please post in here or PM me, Ill be glad to help.
Things you will need.
1. sandpaper (all grits)
2. power sander
3. metal tape
4. bondo
5. newspaper
6. painters tape
7. primer paint
8. body color paint
9. clear coat paint
10. power buffer
11. cutting and buffing wax
A few notes:
- the paint i used was duplicolor exact match Hyundai Silver, its a 99.99% match.
- make sure you have a covered area to keep the car overnight to keep bugs or rain from getting on the paint.
- take your time and be thorough with the sanding.
- All of the materials cost me around $100
Step by step process.
1. First thing you need to do is take off the spoiler. This is done by unscrewing the four screws holding it from the inside of the deck lid.
this is what it will look like:
2. Once you have the spoiler off it is time to mask off the entire area. Take your time doing this as you want to cover every possible area. over spray is not a fun thing to deal with.
this is how mine looked:
3. After you have it all masked off you can start sanding. Start out with a low grit and work your way to a higher grit. Make sure you sand the entire area evenly. If you have high and low spots they will show up when you paint.
almost there:

After this pic was taken I continued to sand until i was pleased with the entire surface. Make sure everything is nice and smooth.
4. Once its all smooth I covered the holes with the metal tape.
5. Now that the tape is on you can go ahead and Bondo over them. This was my first time with Bondo and it was so easy. Just follow the directions on the container. I used about a tablespoon of Bondo or each hole. Smooth out the Bondo with the supplied tool and wait for it to harden.
6. Once the Bondo is hardened you can sand it down. This is a crucial aspect of the process. Take your time sanding down the Bondo so it is even with the surrounding areas. Once again, you will see any high or low spots when you paint.

7. examine the area for any flaws. After this step their is no going back without having to sand it down and starting over.
8 Apply the primer coat. I did three coats with about 30 minutes in between each one.
9. Apply the color coat. I did 3 coats with 1 hour between coats. Let the final coat dry for a few hours.
10. Apply the clear coat. I used 2 coats and 1 hour between. Let the clear dry for as many hours as possible. I let mine dry overnight.
11. Once the clear is dried you will need to wetsand it and buff it to make it really shine.
Here is what the finished product looks like:

If anyone has any questions please post in here or PM me, Ill be glad to help.