DYI: Repainting Your Stock Mirrors
Tools Needed:
- Phillips head screwdriver
- Flat head screwdriver
- Small Flat head screwdriver
- Alen wrentch set
- Sandpaper 120, 800, 1000 grit
- Trash bags or disposible tablecloth
- Duplicolor Automotive Primer
- Duplicolor Automotive Paint ( Your choice color )
- Duplicolor Automotive Clearcoat
- Power sander ( or lots of elbow grease )
- Solder iron and solder
- Heat gun ( I used a Milwaukee Heat Gun Model 1400 )
- Paper Towels
After almost a full year of joining the NT Community and getting help from members reguarding questions I had, I feel it is my honor to give back to the community. Back in the summer of 2010, I decided to start working on my newly aquired 2006 Tiburon V6 Auto by repainting the passenger, and driver side mirrors. This is why...
![]()
I see this problem alot on older vehicles. The clearcoat starts to chip away from the car on painted plastics. So without further delay, I give you....the DIY.
Step 1: Removal
First you have to remove the plastic cover that covers the 3 bolts you will need to unscrew. It is held in by both sides of the cover. Fold your mirror facing the drivers side. Take the flat head and start prying gently on the small part of ether the left or right side of the plastic cover. It should pop right out with a small amount of force.
![]()
Now take an Alen wrentch and unscrew the 3 bolts that hold in the mirror bracket. Dislodge the mirror bracket from the seat. If you have heated/power mirrors, there will be a harness you need to unplug. After that, there is a black gasket that needs to come off as well, just pull that out. At this point the assembly should be detached. Go ahead and screw the 3 bolts back into the holes so you don't lose them. Keep everything together by reassembling it on the mirror assembly.
![]()
![]()
Step 2: Disassembly
Now we are going start disassembling the guts of the mirror so that we can prep the surface to be painted. First your gonna want to unscrew the tab that holds the gasket in.
![]()
Now pull the gasket off and set it aside with the tab.
![]()
Unscrew the wire harness...
![]()
The wire harness is connected to the heating element and the motors, so you can't pull it out yet. Unscrew these 3 screws that hold the metal bracket on.
![]()
After you've done that, you need to remove this black plastic plate held in by 2 screws.
![]()
Remove this screw that holds the inner frame into place.
![]()
Now comes the tricky part. In order to be able to sand the outside AND some of the inside, the mirror itself need to come out. If your not comfortable with this, just use masking tape and tape up the mirror so you don't paint it. To remove the actual mirror you have to simply pull it out. It is held in place by 4 tabs that connect it to the motor assembly in the middle. This is what they look like...
![]()
Start at the top corner and slowly tug on it by reaching your fingers inside and pushing up on it from the middle. Don't worry if you hear clicking from the inside, thats the gears moving around. Just be gentle with it.
![]()
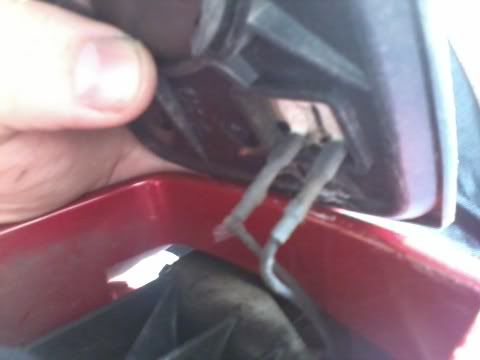
After the mirror is out, and hopefully not snapped in half, you will need to disconnect the two wires attached to the heating element.
![]()
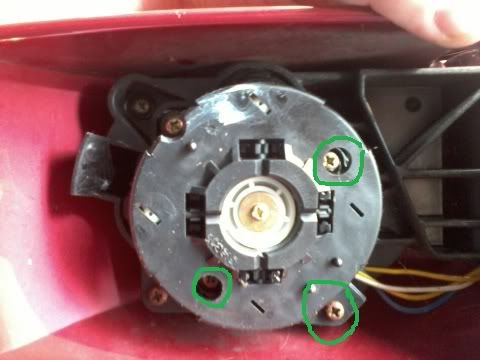
Once that is all done, the motor housing has to come out. Go ahead and take out the 3 screws that hold in the plastic swash plate and motor box.
![]()
At this point I took a break and knocked back 3 quarters of an Iced tea bottle. Feel free.
![]()
Now you have two options here. Ether cut the wires between the motor box and harness so you can remove the harness to make life easy, or do it the hard way and unsolder them at the motor solder points. I did it the hard way.
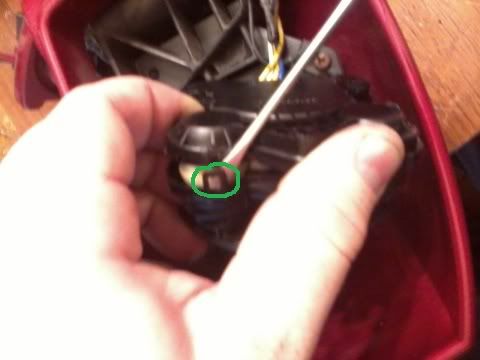
To do it the hard way, the motor box has to come apart. Start by prying the little clips apart to releast the top half. I believe there are 6 of them.
![]()
Once the box is open it will look like this.
![]()
Now you just take the motors out and leave the gears inside.
![]()
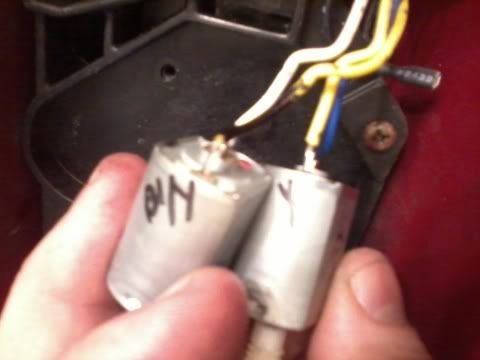
You'll want to label each motor with a sharpie so that when you go to resolder the wires, you won't mix them up.
![]()
Tools Needed:
- Phillips head screwdriver
- Flat head screwdriver
- Small Flat head screwdriver
- Alen wrentch set
- Sandpaper 120, 800, 1000 grit
- Trash bags or disposible tablecloth
- Duplicolor Automotive Primer
- Duplicolor Automotive Paint ( Your choice color )
- Duplicolor Automotive Clearcoat
- Power sander ( or lots of elbow grease )
- Solder iron and solder
- Heat gun ( I used a Milwaukee Heat Gun Model 1400 )
- Paper Towels
After almost a full year of joining the NT Community and getting help from members reguarding questions I had, I feel it is my honor to give back to the community. Back in the summer of 2010, I decided to start working on my newly aquired 2006 Tiburon V6 Auto by repainting the passenger, and driver side mirrors. This is why...

I see this problem alot on older vehicles. The clearcoat starts to chip away from the car on painted plastics. So without further delay, I give you....the DIY.
Step 1: Removal
First you have to remove the plastic cover that covers the 3 bolts you will need to unscrew. It is held in by both sides of the cover. Fold your mirror facing the drivers side. Take the flat head and start prying gently on the small part of ether the left or right side of the plastic cover. It should pop right out with a small amount of force.
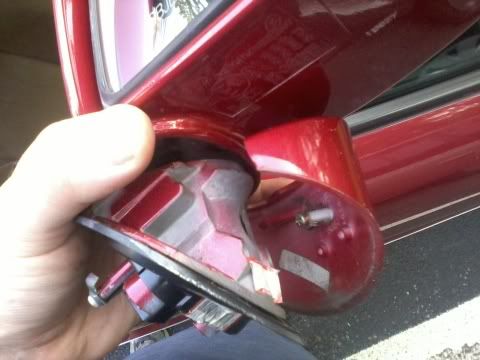
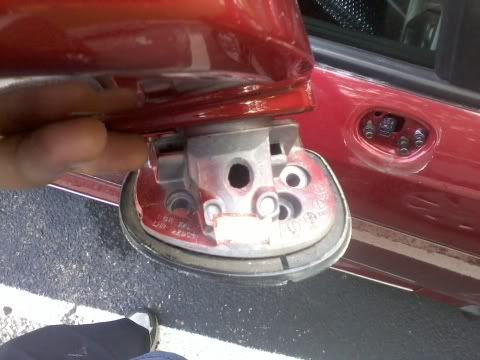
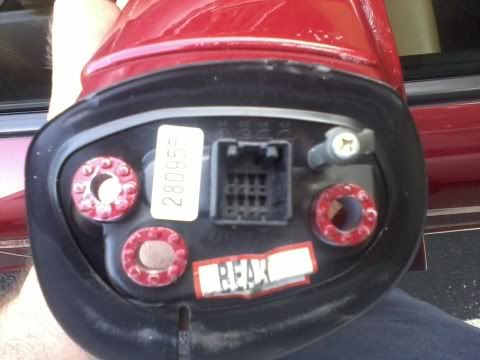
Now take an Alen wrentch and unscrew the 3 bolts that hold in the mirror bracket. Dislodge the mirror bracket from the seat. If you have heated/power mirrors, there will be a harness you need to unplug. After that, there is a black gasket that needs to come off as well, just pull that out. At this point the assembly should be detached. Go ahead and screw the 3 bolts back into the holes so you don't lose them. Keep everything together by reassembling it on the mirror assembly.
Step 2: Disassembly
Now we are going start disassembling the guts of the mirror so that we can prep the surface to be painted. First your gonna want to unscrew the tab that holds the gasket in.
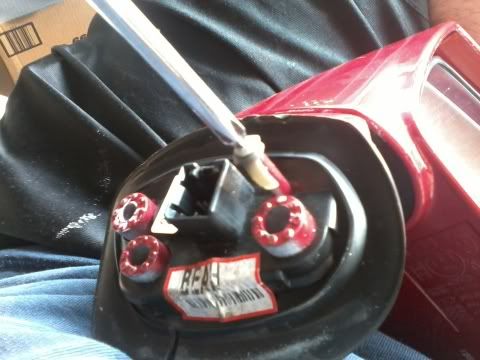
Now pull the gasket off and set it aside with the tab.
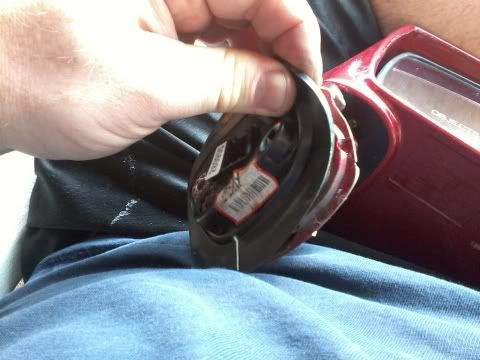
Unscrew the wire harness...
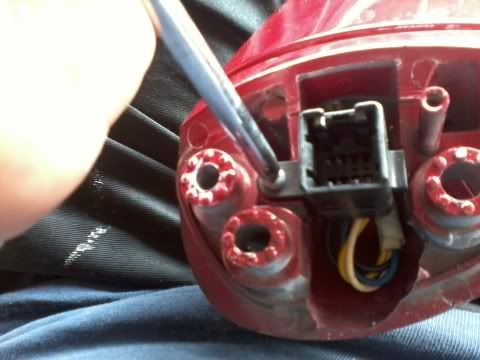
The wire harness is connected to the heating element and the motors, so you can't pull it out yet. Unscrew these 3 screws that hold the metal bracket on.
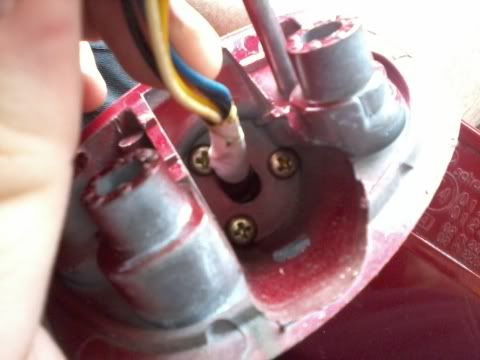
After you've done that, you need to remove this black plastic plate held in by 2 screws.
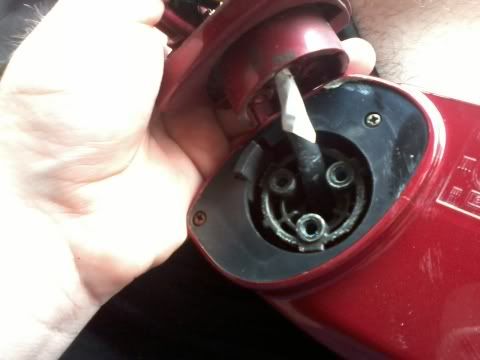
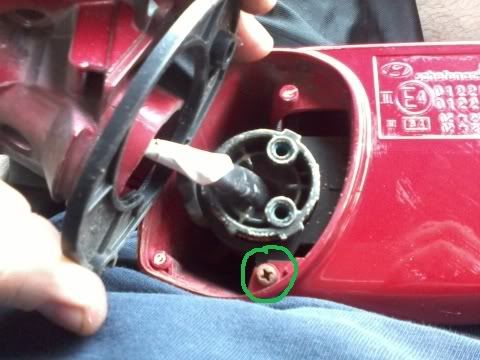
Remove this screw that holds the inner frame into place.
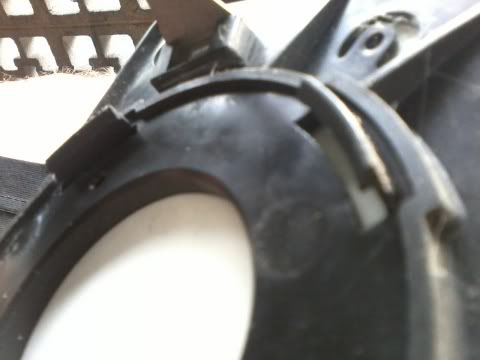
Now comes the tricky part. In order to be able to sand the outside AND some of the inside, the mirror itself need to come out. If your not comfortable with this, just use masking tape and tape up the mirror so you don't paint it. To remove the actual mirror you have to simply pull it out. It is held in place by 4 tabs that connect it to the motor assembly in the middle. This is what they look like...
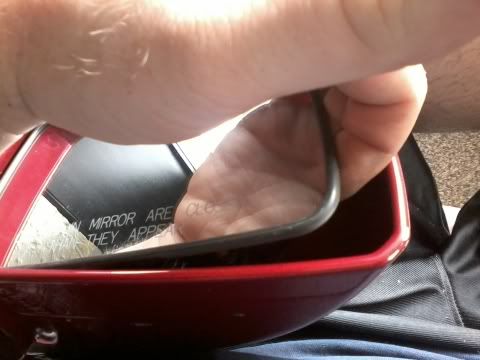
Start at the top corner and slowly tug on it by reaching your fingers inside and pushing up on it from the middle. Don't worry if you hear clicking from the inside, thats the gears moving around. Just be gentle with it.
After the mirror is out, and hopefully not snapped in half, you will need to disconnect the two wires attached to the heating element.
Once that is all done, the motor housing has to come out. Go ahead and take out the 3 screws that hold in the plastic swash plate and motor box.
At this point I took a break and knocked back 3 quarters of an Iced tea bottle. Feel free.
Now you have two options here. Ether cut the wires between the motor box and harness so you can remove the harness to make life easy, or do it the hard way and unsolder them at the motor solder points. I did it the hard way.
To do it the hard way, the motor box has to come apart. Start by prying the little clips apart to releast the top half. I believe there are 6 of them.
Once the box is open it will look like this.

Now you just take the motors out and leave the gears inside.
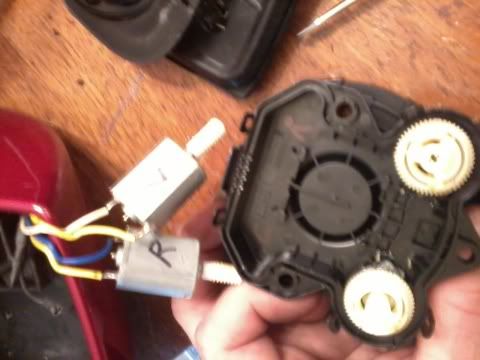
You'll want to label each motor with a sharpie so that when you go to resolder the wires, you won't mix them up.
